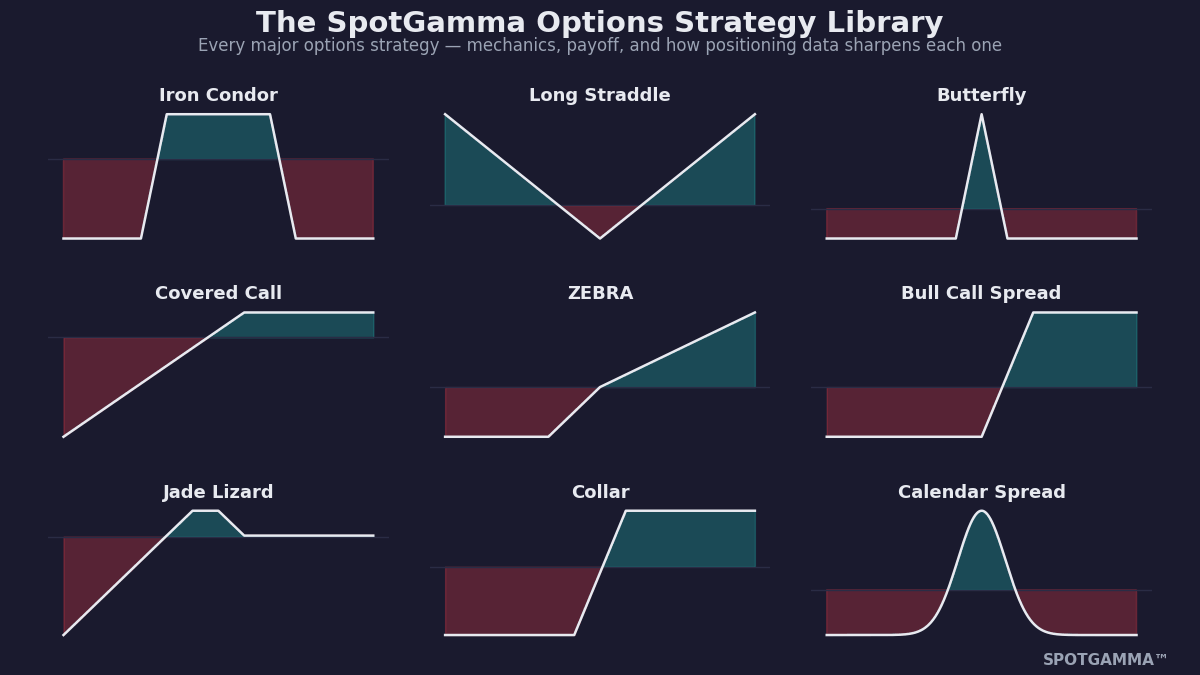
An options strategy is a combination of option legs — calls, puts, and sometimes stock — structured to express a specific view with a specific risk profile. Choosing one comes down to three questions. Direction: do you expect the underlying to rise, fall, or stay in a range? Volatility: is the move you expect bigger or smaller than what options are pricing, and is implied volatility rich or cheap? Risk tolerance: do you want losses capped by construction, or are you willing to carry open-ended exposure for more premium? Every structure in this library is an answer to some combination of those three questions — and every guide below includes the payoff diagram, a worked example, and the positioning data that sharpens the strike selection.
Directional Strategies
Structures for a view on where price is going, with risk defined by construction.
- Bull Call Spread — defined-risk upside: buy a call, sell a higher one to cut the cost.
- Bear Put Spread — the mirror image for downside, with the short strike as the profit target.
- Risk Reversal — sell a put to finance a call, monetizing skew to trade direction for near-zero cost.
- Synthetic Long Stock — long call plus short put at one strike: shares replicated via put-call parity.
- ZEBRA — a 2:1 back ratio that mimics 100 shares with near-zero extrinsic value and defined risk.
- LEAPS — long-dated options for multi-year exposure with a fraction of the capital.
- Call Backspread — sell one, buy two: long convexity positioned for the melt-up.
Income & Premium Selling
Structures that collect option premium — for yield on stock you own, or as a standalone bet that a level holds.
- Covered Call — the foundational income trade: sell calls against 100 shares.
- Poor Man’s Covered Call — the same engine with a deep-ITM LEAPS replacing the stock.
- Bull Put Spread — collect a credit betting a support level holds, with defined risk below.
- Bear Call Spread — fade rallies with a defined-risk credit above resistance.
- Jade Lizard — short put plus short call spread, built so the upside carries zero risk.
- Covered Strangle — stock plus a short strangle around it: double premium, double commitment.
- The Wheel — the cash-secured-put-to-covered-call rotation, end to end.
- Cash-Secured Puts — strike selection for getting paid to buy stock lower.
- Is Selling Options Profitable? — the honest math behind the premium-selling edge.
Range & Pinning Strategies
Structures that profit when price stays inside a range or finishes at a strike — the natural home of gamma and open-interest data.
- Iron Condor — rent collected on a range, with defined risk beyond the wings.
- Iron Butterfly — maximum premium at the pin: a short straddle with protective wings.
- Butterfly Spread — the purest pin trade: a cheap bet that price finishes at a strike.
- Broken Wing Butterfly — skip a strike to finance the fly, shifting all risk to one side.
- Calendar Spread — sell fast front-month decay against a slower back-month option.
- Diagonal Spread — a calendar with a view: direction plus time decay.
- Double Diagonal — an iron condor with its wings in a later month, softening vol-spike risk.
- Ratio Spread — buy one, sell two: paid most at the short strike, wounded by runaways.
- Box Spread — the options market’s bond: a locked-in payoff regardless of price.
Volatility Strategies
Structures for a view on movement itself — or for protecting a portfolio against it.
- Long Straddle — a call and put at one strike: the direct bet on a big move either way.
- Long Strangle — the cheaper version with OTM strikes, needing a bigger move to pay.
- Protective Put — insurance for a stock position, cheapest when bought before it’s needed.
- Collar — fund the protective put by selling a call: a floor and a cap for near-zero cost.
Trade Strategies With Positioning Data
Every guide in this library closes with the same section: how to use options positioning data to pick strikes and time entries. That is not an accident — the strikes where dealers carry the most gamma are the levels where hedging flows have historically stalled rallies, slowed declines, and pinned price into expiration. Knowing where those levels sit turns strike selection from a round-number habit into a data decision: credit sellers place short strikes beyond the Call Wall and Put Wall, debit buyers target them, and pin traders center on them.
The regime matters as much as the levels. Positive gamma exposure (GEX) environments dampen movement and favor range and income structures; negative-gamma environments extend moves and favor owning convexity. Before placing any structure here, build it in SpotGamma’s free Options Profit Calculator to stress the payoff across price, time, and volatility.
This article is for educational purposes only and is not financial advice. Options involve substantial risk and are not suitable for all investors.